How To Connect Multiple Database With Node JS and Prisma
Ken Aqshal Bramasta / January 30, 2023
6 min read • ––– views

Have you ever been in a situation where you have to access two databases on different platforms in an application?
Well, you found the right place to seek for help! When I researched this, I thought it would be very easy because I thought ORM currently supports the multiple database feature for my needs. But when I did research, I found that Prisma can only support multiple schema in its official documentation.
Given that idea, it couldn't fit in to the business case I was facing, not until I found this
This works like magic! I could access both PostgreSQL and MySQL databases in one application simultaneously.
Now, I'll show you how to do it. Follow me.
Step 1: Prerequisite
What you need:
- Node JS
- Nest JS CLI
- PostgreSQL
- MySQL
Preparing Repository
We will be doing this tutorial with a Nest JS template. Therefore, if you haven't installed the NestJS CLI yet, you need to install it globally first
1npm install -g @nestjs/cli After that, we initialize the project with the command
1 nest new multi-database-prisma When there is a choice, we choose npm then after it's done we move to the folder, then we move to the project and install Prisma with the command
1cd multi-database-prisma && npm install prisma --save-devThen when it's done, we will initialize Prisma with the command
1npx prisma initThe above command does 2 things:
- Create a
prismafolder containing theschema.prismafile - Create a
.envfile After all the steps above are done, you're finished preparing the project repository we will use, but you can also check the official documentation if you want to know more.
Preparing Database
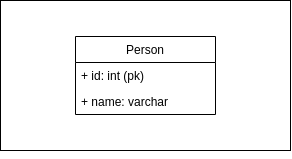
After we've finished setting up the repository, you need to prepare a simulation of the existing databases. In this case, the naming of the 2 databases and each of their tables will be like this:
First Database:
name: first_db
platform: PostgreSQL
table: person
Second Database:
name: second_db
platform: MySQL
table: pets

You can create tables with a structure like the above by running the following queries:
first_db(PostgreSQL)
1CREATE DATABASE "first_db";
2CREATE TABLE "public"."person" ("id" serial,"name" text NOT NULL, PRIMARY KEY ("id"));
3INSERT INTO "public"."person" ("name") VALUES ('ken');
second_db(MySQL)
1CREATE DATABASE `second_db`;
2CREATE TABLE `second_db`.`pets` (`id` int NOT NULL AUTO_INCREMENT,`name` varchar(255),`type` varchar(255),`owner_id` int, PRIMARY KEY (id));
3INSERT INTO `second_db`.`pets` (`name`, `type`, `owner_id`) VALUES ('mochi', 'cat', '1');
Step 2: defining the first database connection
First, you need to fill in the DATABASE_URL variable in the .env file according to the credentials formed into a connection string like this. In the local env, the value of the env becomes like this
1postgresql://postgres:root@localhost:5432/db_name?schema=publicbecause in this case, we will be using an existing database, we will run
1npx prisma db pullso we can generate schema based on the connected database.
After the above process is successful, we will generate the prisma client with the command.
1npx prisma generate according to the data model defined in the prisma/schema.prisma file.
Step 3: defining the second database connection
To define the second part, we need to create a new folder at the root named prisma-second, inside it we will create a file schema.prisma like this:
1generator client {
2  provider = "prisma-client-js"
3  output   = "../node_modules/@internal/prisma-second/client"
4}
5
6datasource db {
7  provider = "mysql"
8  url      = env("SECOND_DATABASE_URL")
9}
You might wonder why do we have to add the output to the client. It's because when there are 2 instances of Prisma in one application, we have to specify the output when generating the data model, as mentioned here to avoid overwriting the Prisma client from the first database connection.
Then, we need to add the SECOND_DATABASE_URL variable to the .env file, and you fill in the DB credentials according to the connection string format like this in my case, the value of the variable will be like this:
1mysql://root:root@localhost:3306/second_dbAfter that, we will do the DB pull again but with the added schema argument to generate the second connection using this command:
1npx prisma db pull --schema=./prisma-second/schema.prismaAfter we finish generating the data model for the second existing database, we will then generate the Prisma client for the second DB using the command:
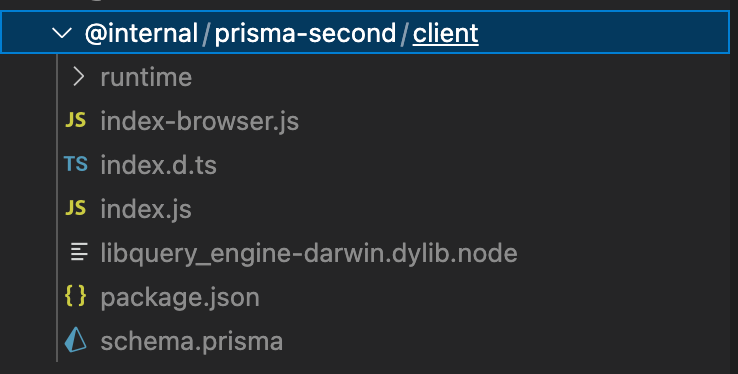
1npx prisma generate --schema=./prisma-second/schema.prismaAnd we must also add the schema argument to specify the schema we want to generate the Prisma client for. And if you look in the node_modules/@internal there will be a folder called Prisma Second, according to the path we defined in the schema.prisma file in the prisma-second folder.
Step 4: Fetch data from 2 data source
You will be trying to retrieve data from 2 different data sources. First of all, we will create a folder named prisma under src containing 3 files like this
prisma.service.ts
1import { Injectable, OnModuleDestroy, OnModuleInit } from '@nestjs/common';
2import { Prisma, PrismaClient } from '@prisma/client';
3
4
5@Injectable()
6export class PrismaService
7  extends PrismaClient<Prisma.PrismaClientOptions, 'error' | 'query'>
8  implements OnModuleInit, OnModuleDestroy {
9
10  async onModuleInit() {
11    await this.$connect();
12
13    this.$on('error', (_e) => {
14      // Do something
15    });
16
17  }
18
19  async onModuleDestroy() {
20    await this.$disconnect();
21  }
22}
23
prisma-second.service.ts
1import { Injectable, OnModuleDestroy, OnModuleInit } from '@nestjs/common';
2import { Prisma, PrismaClient } from '@internal/prisma-second/client';
3
4@Injectable()
5export class PrismaSecondService
6  extends PrismaClient<Prisma.PrismaClientOptions, 'error' | 'query'>
7  implements OnModuleInit, OnModuleDestroy {
8
9
10  async onModuleInit() {
11    await this.$connect();
12
13    this.$on('error', (_e) => {
14      // Do something
15    });
16
17  }
18
19  async onModuleDestroy() {
20    await this.$disconnect();
21  }
22}
23
prisma.module.ts
1import { Module } from '@nestjs/common';
2import { PrismaSecondService } from './prisma-second.service';
3
4import { PrismaService } from './prisma.service';
5
6@Module({
7  providers: [PrismaService, PrismaSecondService],
8  exports: [PrismaService, PrismaSecondService],
9})
10export class PrismaModule {}
11
Your folder's structure should be like this when you've added the files.

After defining the Prisma module, we will create an API that will retrieve Person and Pets data from 2 different databases and return the result when we hit the API. To do that, change the files below like this: app.service.ts
1import { Injectable } from '@nestjs/common';
2import { PrismaService } from './prisma/prisma.service';
3import { PrismaSecondService } from './prisma/prisma-second.service';
4@Injectable()
5export class AppService {
6  constructor(private prisma: PrismaService, private prisma_second: PrismaSecondService) {}
7
8  async getData(): Promise<any> {
9
10    const persons = await this.prisma.person.findMany();
11
12    const pets = await this.prisma_second.pets.findMany();
13
14    let data = persons.map(person =>{
15      let pet = pets.filter(x => x.owner_id === person.id)
16      return {
17        ...person,
18        pets: pet
19      }
20    })
21
22    return data
23  }
24}
app.controller.ts
1import { Controller, Get } from '@nestjs/common';
2import { AppService } from './app.service';
3
4@Controller()
5export class AppController {
6  constructor(private readonly appService: AppService) {}
7
8  @Get()
9  getData() {
10    return this.appService.getData();
11  }
12}
app.module.ts
1import { Module } from '@nestjs/common';
2import { AppController } from './app.controller';
3import { AppService } from './app.service';
4import { PrismaModule } from './prisma/prisma.module';
5
6@Module({
7  imports: [PrismaModule],
8  controllers: [AppController],
9  providers: [AppService],
10})
11export class AppModule {}
12
Then run the command below to start:
1npm run start If successful, next you need to open http://localhost:3000 then we will successfully be able to call the API with 2 different data sources

Conclusion
You can create multiple database connections of different types in one project using Prisma.io as long as you pay attention to the following things:
- Creating separate schema.prisma files that are separate from one another
- Defining output for each Prisma client and ensuring that there are no paths that are the same
- Running the
npx prisma db pullandnpx prisma generatecommands for the other Prisma instances with the--schemaargument to specify which schema we will run - Defining a different Prisma service for each connection.
Resource
- Full code repository
- Multiple schema documentation
- Multiple Database / Datasource issue
Enjoyed this post?
Check out some of my other articles: